
Multifamily Renovation Sequencing: Why Doing Things in the Wrong Order Will Cost You Thousands
Part of our Multifamily Renovations guide.

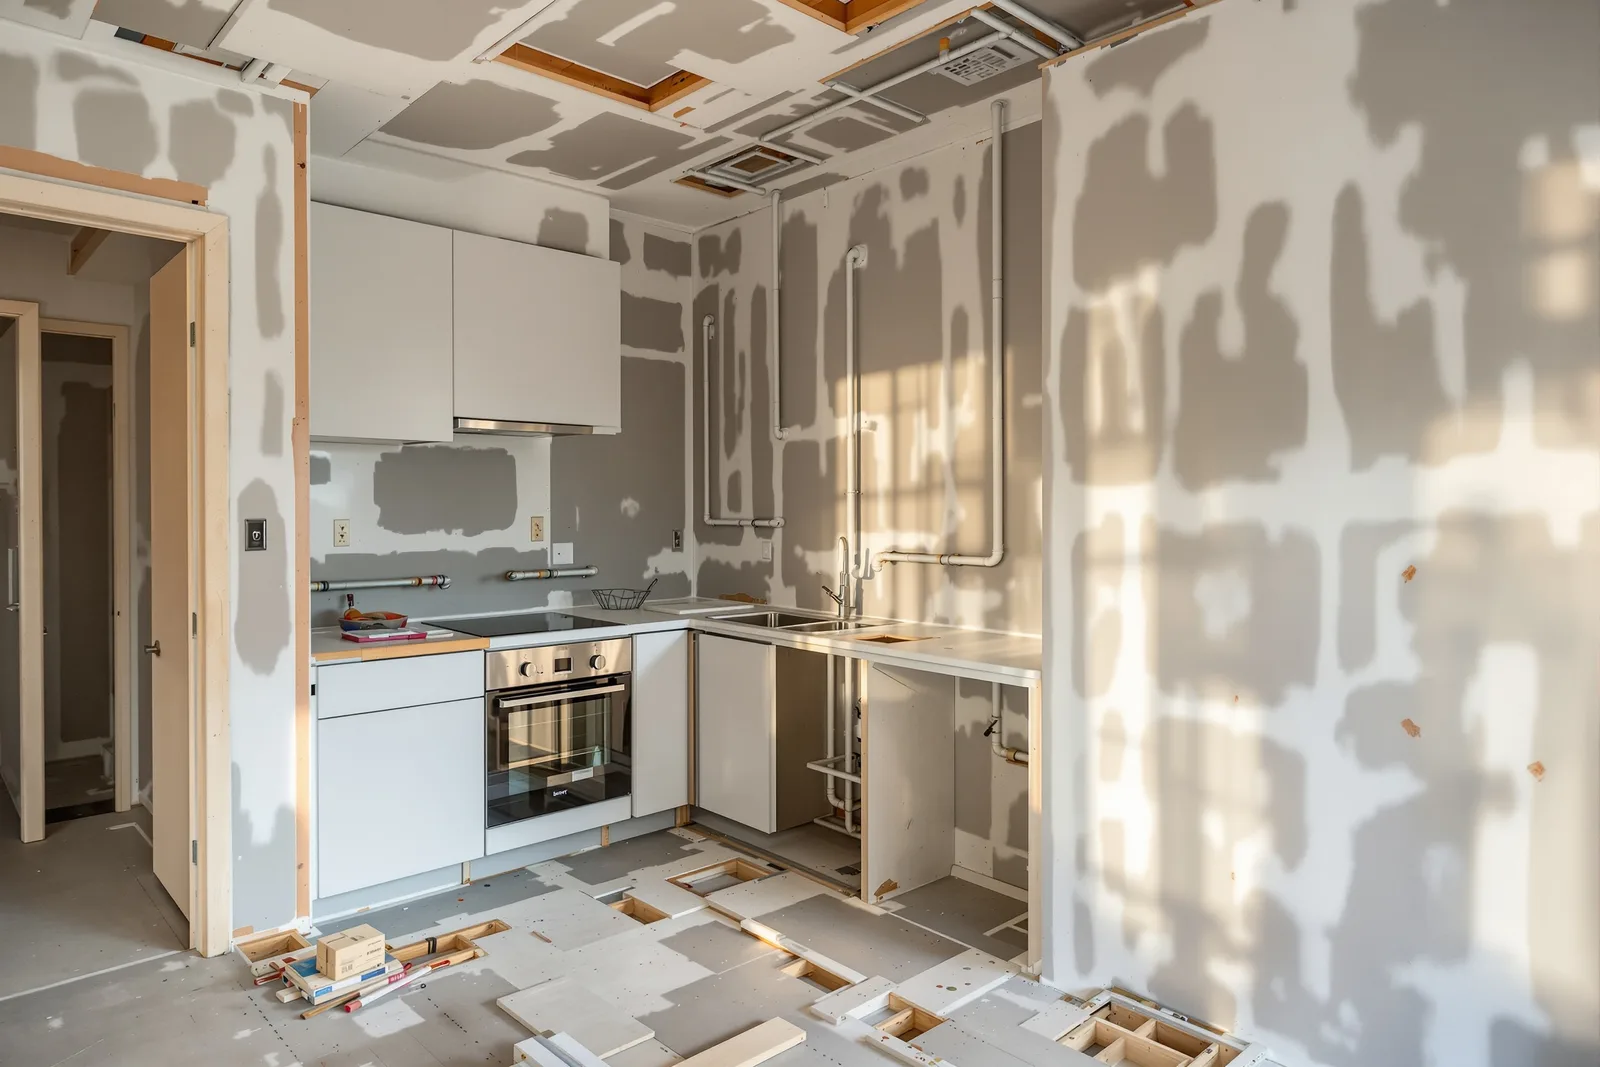
Every multifamily renovation has a hidden backbone that most property owners never think about until it is too late: sequencing. You can buy the best materials, hire skilled contractors, and set a generous budget -- but if the work happens in the wrong order, you will pay for the same task twice, fix preventable damage, and watch your timeline stretch by weeks. The typical results are familiar to anyone who has managed a renovation: drywall torn open after it was just painted, new flooring pulled up to reach a failed drain line, finished ceilings cut open for ductwork. Those are sequencing failures, and they are avoidable.
The Core Principle: Protect What You Cannot Replace Easily
The fundamental rule of renovation sequencing is simple: the hardest and most disruptive work happens first, and the most visible and delicate finishes happen last. If you flip that order, every subsequent trade will damage or destroy what came before it. This sounds obvious, but in the urgency to get units back on the market, owners and inexperienced contractors constantly rush visible progress -- paint, flooring, fixtures -- while pushing structural and systems work to the background. That approach creates a cascading failure that inflates costs and extends timelines far beyond what a properly sequenced job would require.
Phase 1: Demolition, Abatement, and Structural Assessment
The first step in any multifamily renovation is removing everything that is not staying. This includes flooring, cabinets, fixtures, drywall in gut areas, old insulation, and any hazardous materials that require licensed abatement. In Texas and Oklahoma, properties built before 1980 frequently contain asbestos in flooring adhesives, popcorn ceilings, and pipe insulation. Lead paint is common in pre-1978 buildings. In Texas, asbestos abatement is done by contractors licensed by the Department of State Health Services, and renovation that disturbs lead paint in pre-1978 housing needs an EPA RRP-certified firm. Either can add time to the demolition phase.
This phase also includes a full structural assessment once walls and ceilings are opened. We inspect for termite damage, water intrusion, foundation settling, and outdated structural systems. Discovering these issues after new finishes are installed means paying for the finishes twice: new flooring and cabinets laid over a subfloor rotted by a slow leak have to come back out before the subfloor can be replaced.
Phase 2: Structural Framing and Subfloor Repairs
Once the space is stripped and assessed, structural work comes next. This includes sistering or replacing rotted joists, reinforcing load-bearing walls, repairing or replacing subflooring, and framing new walls or openings for layout changes. Any structural modifications must be completed and inspected before mechanical systems are run through them.
Skipping this order creates serious problems. If you run plumbing or electrical before structural repairs are finalized, you may find that a new beam needs to go exactly where a drain line was just installed. Moving that drain line means cutting open finished work -- or worse, redesigning the structural fix around the plumbing, which may not be structurally sound. At UTS BuildPros, we require a signed structural inspection report before any mechanical contractor steps on site.
Phase 3: Rough Plumbing -- Before Anything Else Goes In
Plumbing is the most unforgiving trade when it comes to sequencing mistakes. Water lines, drain lines, and vent stacks run through walls, floors, and ceilings. Once they are pressure-tested and inspected, they must remain undisturbed. If you install flooring or drywall before the plumbing rough-in is complete and inspected, any leak or failed test means cutting into finishes to access the problem.
The correct sequence is: rough plumbing installed, tested as the plumbing code and the inspector require, inspected, and only then proceed to the next trade. If flooring goes down while plumbing is still being roughed in, a failed pressure test on an upper-floor drain line means removing the new flooring, opening the subfloor, repairing the line, and reinstalling both, with the unit offline for the whole cycle.
Phase 4: Rough Electrical and Low-Voltage Wiring
With plumbing inspected and secured, electrical rough-in comes next. This includes panel upgrades, circuit routing, outlet and switch box installation, lighting layout, and low-voltage wiring for internet, security, and smart home systems. Electricians need open wall and ceiling cavities to run conduit and wire. If drywall or insulation is already in place, they must cut openings, creating repair work for the finish crew.
A common sequencing error is installing insulation before electrical rough-in is complete. Fiberglass insulation must be pulled aside or removed to add circuits, then reinstalled afterward -- often unevenly and with gaps that reduce R-value. Spray foam is even worse: once it is applied, adding or relocating wiring requires cutting through cured foam, which cannot be seamlessly repaired. The correct order is electrical rough-in, inspection, then insulation.
Phase 5: HVAC Rough-In and Ductwork
Heating, ventilation, and air conditioning systems come after electrical because HVAC controls and thermostats require low-voltage wiring, and many modern systems integrate with smart electrical panels. Ductwork, vent lines, and equipment pads are installed during this phase. In multifamily properties with central systems, this may also include rooftop unit installation or chiller connections.
HVAC must be completed before insulation and drywall because ducts run through wall cavities, ceiling soffits, and attic spaces. If drywall is installed first, HVAC contractors must cut access holes, create soffits after the fact, or route ducts in ways that reduce airflow efficiency. Ceiling drywall hung before the HVAC rough-in forces ducts into soffits built after the fact, which collide with the lighting layout and usually end with the ceiling coming down and going back up.
Phase 6: Insulation and Air Sealing
Insulation goes in after all mechanical systems are in place but before the building envelope is closed. This includes wall cavity insulation, attic insulation, duct insulation, and spray foam or caulk air sealing around penetrations. Insulation is the thermal boundary of the building, and it must be continuous and uninterrupted to work properly.
Installing insulation before mechanical systems means cutting holes in it for every wire, pipe, and duct that comes later. Each penetration is a thermal bridge and an air leak. The correct sequence ensures that insulation is applied once, completely, and without compromise. In Texas, where cooling loads dominate energy costs, gaps left by late penetrations cost money every summer for the life of the building.
Phase 7: Drywall and Wall Finishes
With insulation in place and inspected, the building envelope is closed with drywall or other wall finishes. This is the point where the space begins to look like a finished unit again -- and it is the most common place where impatient owners or contractors try to jump ahead. Drywall must not go up until all rough trades are inspected and approved. Once drywall is installed, accessing plumbing, electrical, or HVAC behind it becomes expensive and disruptive.
A frequent mistake is closing walls before fire blocking and draft stopping are inspected. Most jurisdictions require fire blocking at floor lines, between studs, and around penetrations. If drywall is installed first, inspectors may require removal to verify fire blocking compliance. We hold a pre-drywall walkthrough with the owner or property manager after the required rough inspections pass, so every rough trade is verified complete before a single sheet of drywall is hung.
Phase 8: Flooring -- Never Before Plumbing or Paint
Flooring is one of the most expensive finish materials in a unit, and it is also one of the most vulnerable to damage from subsequent trades. The correct sequencing rule is: flooring goes in after all wet trades and major finish work are complete. This means plumbing pressure tests, drywall finishing, painting, and cabinet installation must all be done before flooring is laid.
Wet trades -- plumbing testing, concrete patching, grout work -- can stain or warp flooring. Paint drips, drywall mud, and construction dust embed in carpet and scratch hard surfaces. Cabinet installation, appliance placement, and fixture mounting can dent, chip, or scuff flooring if it is already down. At UTS BuildPros, we protect installed flooring with Ram Board or comparable hardboard sheeting until final cleaning and punch list. But even with protection, the risk is lower when flooring is the last major finish to go in.
Some contractors install flooring before cabinets to save on material -- cutting flooring around cabinets rather than under them. This is false economy. If a cabinet needs replacement, the flooring pattern is broken. Water leaks under cabinets damage exposed flooring edges. And the small amount of flooring saved is negligible compared to the risk of damage during cabinet installation. We always install flooring after cabinets, running it under toe kicks for a clean, continuous look.
Phase 9: Cabinets, Countertops, and Fixtures
Cabinetry, countertops, sinks, faucets, lighting fixtures, and hardware come after flooring is protected and before final cleaning. These are the visible elements that define the quality of the renovation, and they must be handled carefully to avoid damage. Countertops, in particular, are heavy and awkward to maneuver. A dropped countertop edge can chip tile, dent LVP, or crack porcelain flooring.
The correct sequence is: cabinets installed and leveled, countertop templated and installed, sink and faucet connected by the plumber, backsplash tiled, and then final fixture installation. If the backsplash goes in before the countertop, alignment issues are common. If the faucet is connected before the countertop is secured, water testing can soak unfinished cabinetry. Every step has a specific order, and getting it wrong creates rework.
Phase 10: Final Paint, Cleaning, and Punch List
The last phase is painting touch-ups, final cleaning, and the punch list walkthrough. Despite being the final step, this phase is frequently rushed or skipped, leaving units with paint imperfections, construction debris, and minor defects that disappoint tenants and delay lease-up. A proper final cleaning includes removing all protection materials, vacuuming and mopping all surfaces, cleaning windows and glass, polishing fixtures and hardware, and spot-cleaning any scuffs or marks on walls and flooring.
The punch list is a systematic inspection of every unit against the scope of work. At UTS BuildPros, we conduct a three-stage punch list: the contractor's internal walkthrough, the project manager's quality check, and the owner's final approval. Items are documented with photos and descriptions, assigned to specific trades for correction, and re-inspected before the unit is signed off. This process takes 2 to 3 days for a typical 12-unit phase, but it prevents the far more expensive problem of tenants moving into defective units and demanding repairs under warranty.
The Hidden Cost of Sequencing Mistakes
Poor sequencing does not just create rework. It creates a cascade of delays that affect every subsequent trade. If plumbing fails inspection and drywall is already up, the plumber, drywall crew, and painter all get rescheduled. If flooring is installed early and gets damaged, the flooring crew must return for repairs -- often weeks later, when they are on another job. Each delay compounds, and the project slips further behind schedule.
The most expensive version is a code or scope question discovered after walls are closed: fire protection, fire blocking or an inspector's correction that can only be reached by removing finished work. Confirming those requirements with the authority having jurisdiction before rough-in is cheaper than any amount of rework.
Free Download · 6-Page PDF
Multifamily Renovation Sequencing Checklist
The exact 10-phase execution order our project managers use to prevent the $94,000 mistake you just read about. Print it, check it off, and hand it to your contractor.
- 10-phase trade sequence
- Pre-drywall inspection checklist
- Flooring protection protocol
- Mechanical rough-in guide
- Paint-first decision matrix
- 3-stage punch list system
How to Enforce Proper Sequencing on Your Project
The best way to prevent sequencing failures is to work with a general contractor who uses a documented, trade-by-trade schedule with inspection hold points between each phase. At UTS BuildPros, every multifamily renovation project receives a detailed critical path schedule that identifies: the start and end date for each trade, the inspection requirements and responsible party for each phase, material delivery windows tied to installation dates, and contingency buffers for weather, supply delays, or discovery of hidden conditions.
We also require sign-off at each phase gate. The plumber cannot start until structural is signed off. The electrician cannot start until plumbing is signed off. Drywall cannot start until all rough trades are signed off. Flooring cannot start until all finish trades are signed off. These are not suggestions -- they are contractual milestones with financial consequences for bypassing them. This discipline protects the owner, the timeline, and the budget.
Final Thoughts
Sequencing is the invisible architecture of every successful renovation. It does not show up in the finished product, but it determines whether the finished product arrives on time, on budget, and without defects. Property owners who understand sequencing can ask better questions of their contractors, spot red flags early, and avoid the costly mistakes that derail too many multifamily renovations.
If you are planning a multifamily renovation in Texas, Oklahoma, or Arkansas, contact UTS BuildPros for a free sequencing consultation. We will review your property, your scope, and your timeline -- then build a phase-by-phase plan that protects your investment from the first demolition swing to the final tenant walkthrough.
Related Service
Interested in multifamily renovations? Learn more about how UTS BuildPros can help.
Explore Multifamily RenovationsReady to Start Your Project?
Get a free consultation and detailed estimate from our veteran-owned construction team.